
|
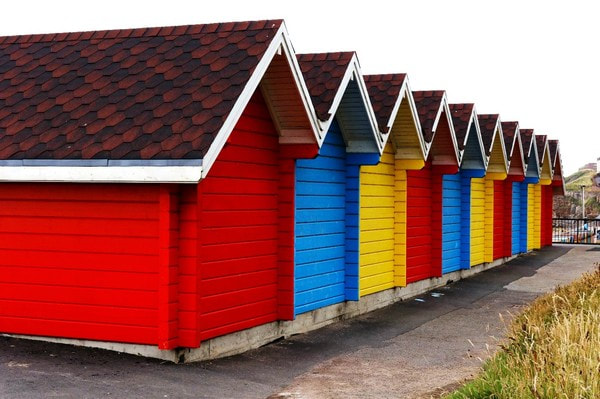
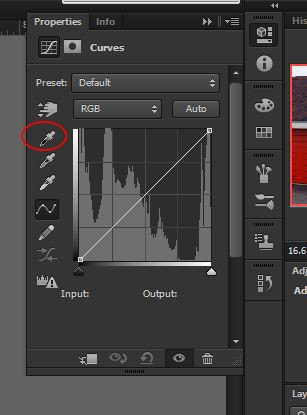
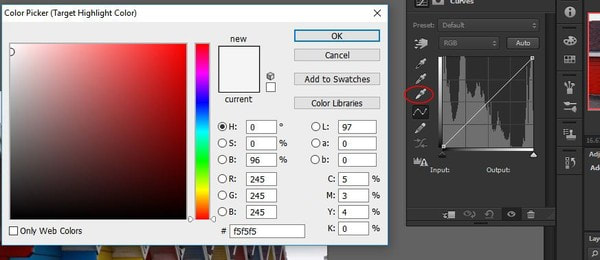
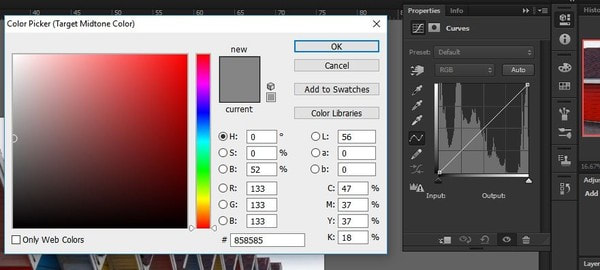
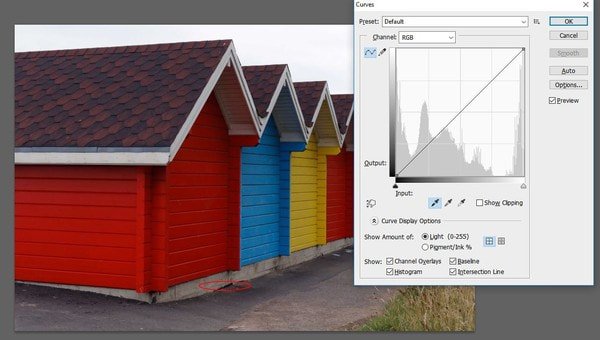
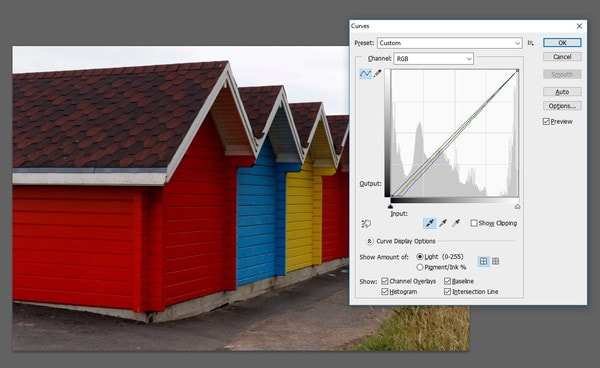
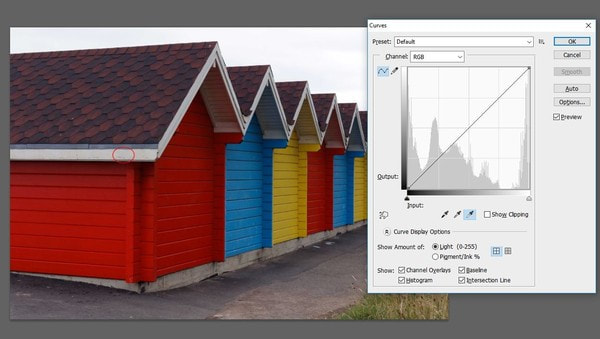
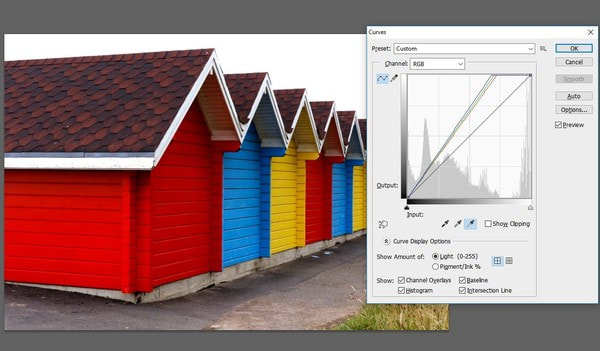
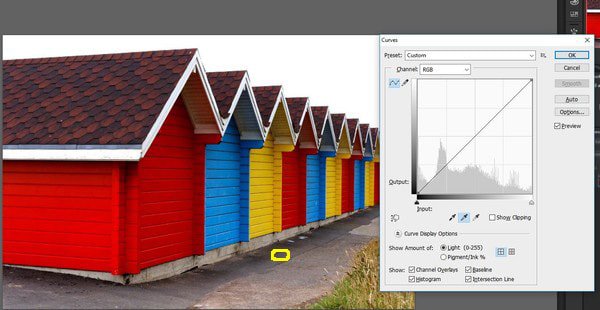
Introduction When I started using Photoshop I had trouble colour correcting them. I did a little research and found this method. I did have to play around with the settings to get the results I was looking for. I changed the Eyedropper Tool measurement settings. The other thing I changed was the background colour. I was using a black background, but when I changed it to Neutral Grey they looked to me to be much better. Step 1 – Go to the Toolbox and select the Eyedropper Tool. Go to the Options Bar at the top of the screen, the default sample size is Point Sample. This setting gives a reading from just one pixel, it is better with an average of the area to be sampled. Change this setting to 3 by 3, if you are to be working on really high resolution images it might be beneficial to set this setting to one of the higher values available in the list. Step 2 - Change The Background Colour I find the best way to see the colours is with a grey background. To change the background just press F once, this centres your image on screen with a Grey background. The above image (click on it for a larger version) has a slight blue cast, and the image is a bit flat, and has a low contrast. First, choose the Curves Dialogue Tool. Next we need to set preferences for Curves. We will start by setting a target colour for our shadow areas. To set this in the Curves Dialogue, double click the Shadow Eyedropper shown circled in the image below (on the left). When you double click on the shadow eyedropper circled in red on the left image, the box on the right (above, click on it for a larger version) appears asking you to select the target shadow colour you want and this one shows the settings I use (these figures are evenly balanced, all having the same value, which ensures your image won’t have too much of any one colour). Try those first, they may be ideal for your setup too. After choosing your colour values click ok. Step 3 – We will now set the Highlight areas to neutral. Double click on the Highlight eyedropper circled in red as shown in the left-hand image below to have a similar dialogue appear asking you to select the target highlight colour you want. Below are the settings I use. Try them first they may be ideal for your setup too. After choosing your colour values click ok. Repeat this for the midtone areas - select the grey midtone eyedropper and enter the values shown in the right-hand image below and click ok. When you click ok to exit the Curves dialogue box you will get a warning asking if you wish to save the new target colours as default. Click ok. The next time you use the curves tool this will be the settings used. The images above showing the entry of the settings are done with a curves layer, the exact same setting can be entered in the Curves Dialogue Box by pressing Ctrl-m, they are there whichever method you wish to use. Step 4 – Now that curves is setup we can start to adjust our image. Below is the image at the top of the article with the Curves Dialogue (Ctrl M) open and the shadow eyedropper selected, and the shadow area I have chosen, circled in red (click on it for a larger version). At the right (above) is the image after clicking the shadow eyedropper on the indicated sample area. The colours have changed, appearing slightly deeper in colour. Step6 – Adjusting the highlight in the image. Below left is our image with the area circled in red as our highlight selection. The white eyedropper is selected. After clicking on the selected highlight area the image below right the shows the result. Now we have the shadows and highlights adjusted we need to find the neutral grey. Choose a point in the image which has a grey near enough neutral and use the grey eyedropper on this part of the image too. I chose the area circled in yellow below. And that's us finished. On the left below (click for a larger version) is the start image from the top of this article (a jpeg straight out of the camera) and on the right is the final image after the process above. No sharpening or any other tweaking of the image has been done. Comments are closed.
|
Archives
April 2024
Categories
|


 RSS Feed
